To colorize a black-and-white photo, open a working copy in Photoshop on desktop, use Colorize to create a first version, then correct specific areas before saving a separate colorized file. For a quick start, open Discover → Browse → Quick Actions → Colorize old photos → Apply. For clothing and skin adjustments, use Filter → Neural Filters → Colorize, which offers color focal points.
The useful goal is a believable interpretation that keeps the photograph's people and detail intact. A convincing jacket color is still a choice unless you have a reference for that jacket. This guide follows Adobe's documented desktop controls; the illustrated example below was made separately with an AI image tool, not Photoshop or Photo Editor AI.
Choose a route that lets you finish the job
Use the Quick Action when you want an automatic starting point. Use the Colorize Neural Filter when you already know that one person's clothing, a wall, or a face will need individual attention. Both routes have published Adobe instructions, linked below. You need access to Photoshop on desktop, and the Neural Filter needs a download before its first use.
For a browser editor, check its actual editing page before uploading: can it colorize an existing image, let you revise the result, and download the file you need? A tool described as “photo restoration” may have a different task. The steps here describe Photoshop controls and should not be treated as controls available in Photo Editor AI.
If your source already contains color that has become weak or shifted, start with the faded-color photo guide. Black-and-white colorization assigns colors to a monochrome image; correcting a faded color scan is a separate job.
1. Keep the original and prepare a working copy
Put the untouched scan in a separate folder, then make a copy with a name such as portrait-color-work. Keep borders and handwritten notes in the original even if you crop the working copy. Open the copy in Photoshop and save your editing document under a new name.
Look for visible eyes, clothing edges, and detail in bright and dark areas. If these are hard to see, improve the scan or make modest tonal corrections before adding color. Avoid combining colorization with aggressive face reconstruction: that makes it harder to tell which operation changed a person's features.
A photo can look black and white while its document is in RGB mode. Adobe's Colorize instructions advise Image → Mode → RGB Color, rather than Grayscale. Changing the mode makes the document capable of holding color; it does not reveal any original colors.
2. Apply an automatic first version
For the quick route, follow Adobe's Colorize old photos Quick Action:
- Open Discover with the search icon in the upper-right workspace, Ctrl + F on Windows, or Cmd + F on Mac.
- Choose Browse → Quick Actions → Colorize old photos.
- Select Apply and inspect the result.
- To try another layer, select that layer and choose Refresh. Choose Revert to undo the Quick Action.
Treat this as a first version. If the main problem is one garment, move to the controlled route below rather than repeatedly changing the whole image.
For that route, Adobe's current desktop Neural Filters guide gives these controls:
- Select Filter → Neural Filters.
- Find Colorize in the Beta filters section. Download it with the cloud icon if needed, then enable its switch.
- Review the automatic preview. Adjust color balance for an overall cast, using small changes so one improvement does not spoil another area.
- Use the preview icon at the lower left to compare before and after.
- When ready, choose New Layer in Output, then select OK. Adobe also lists Smart Filter as an editable, nondestructive output option.
If the filter is unavailable, check the document's RGB mode and whether the initial filter download completed. These instructions apply to the documented desktop interface; do not assume a mobile or web edition has the same menus.
3. Correct one area at a time
In the Neural Filter preview, use color focal points to change an automatic choice. Adobe's Colorize guide describes choosing a color with the Color Picker below the preview, then clicking the area to place a pin. Select an existing pin to change its color, or drag it to reposition it. Alt-drag on Windows or Option-drag on Mac duplicates a pin.
Suppose a family reference identifies a jacket as navy but the first version makes it brown. Choose a restrained navy and place a pin inside the jacket, away from its collar and the person's face. Inspect the result around the shoulders, shirt, hands, and background. A pin affects a related area; do not assume it follows every garment edge precisely. Reposition or revise it if the color spreads into neighboring objects.
For a wrong patch on a face, correct that area before changing the whole photograph's balance. For an image that is uniformly too warm, try the global controls first. This distinction saves you from fixing one cheek by turning a white shirt blue.
After applying the result, compare it with the untouched copy at full size and at the size you will share. Look at hairlines, fingers, collars, teeth, and the boundary between skin and fabric. If a person or object has changed shape, return to the source rather than accepting the change because the color looks attractive. The old-photo likeness guide covers that separate decision.
4. Choose skin and clothing colors with references
For skin, prefer another photograph of the same person over a generic “vintage skin” swatch. Even that reference may have different lighting or a color cast, so use it as guidance rather than copying one flat color over the face. Check cheeks, forehead, hands, and neck together; keep the source's shadow detail visible.
For clothing, the strongest useful reference is the actual garment or a reliable color photograph of it. A relative's recollection can guide your choice, but record it as recollection. A catalog showing a similar coat establishes a possible color, not which coat the person wore.
When you have no reference, choose colors for visual coherence and call them interpretive. You can keep two restrained versions—for example, a blue jacket and a brown jacket—without deciding that either is historical truth. For a family archive, the black-and-white original remains useful alongside the color version.
A colorization example with a synthetic source
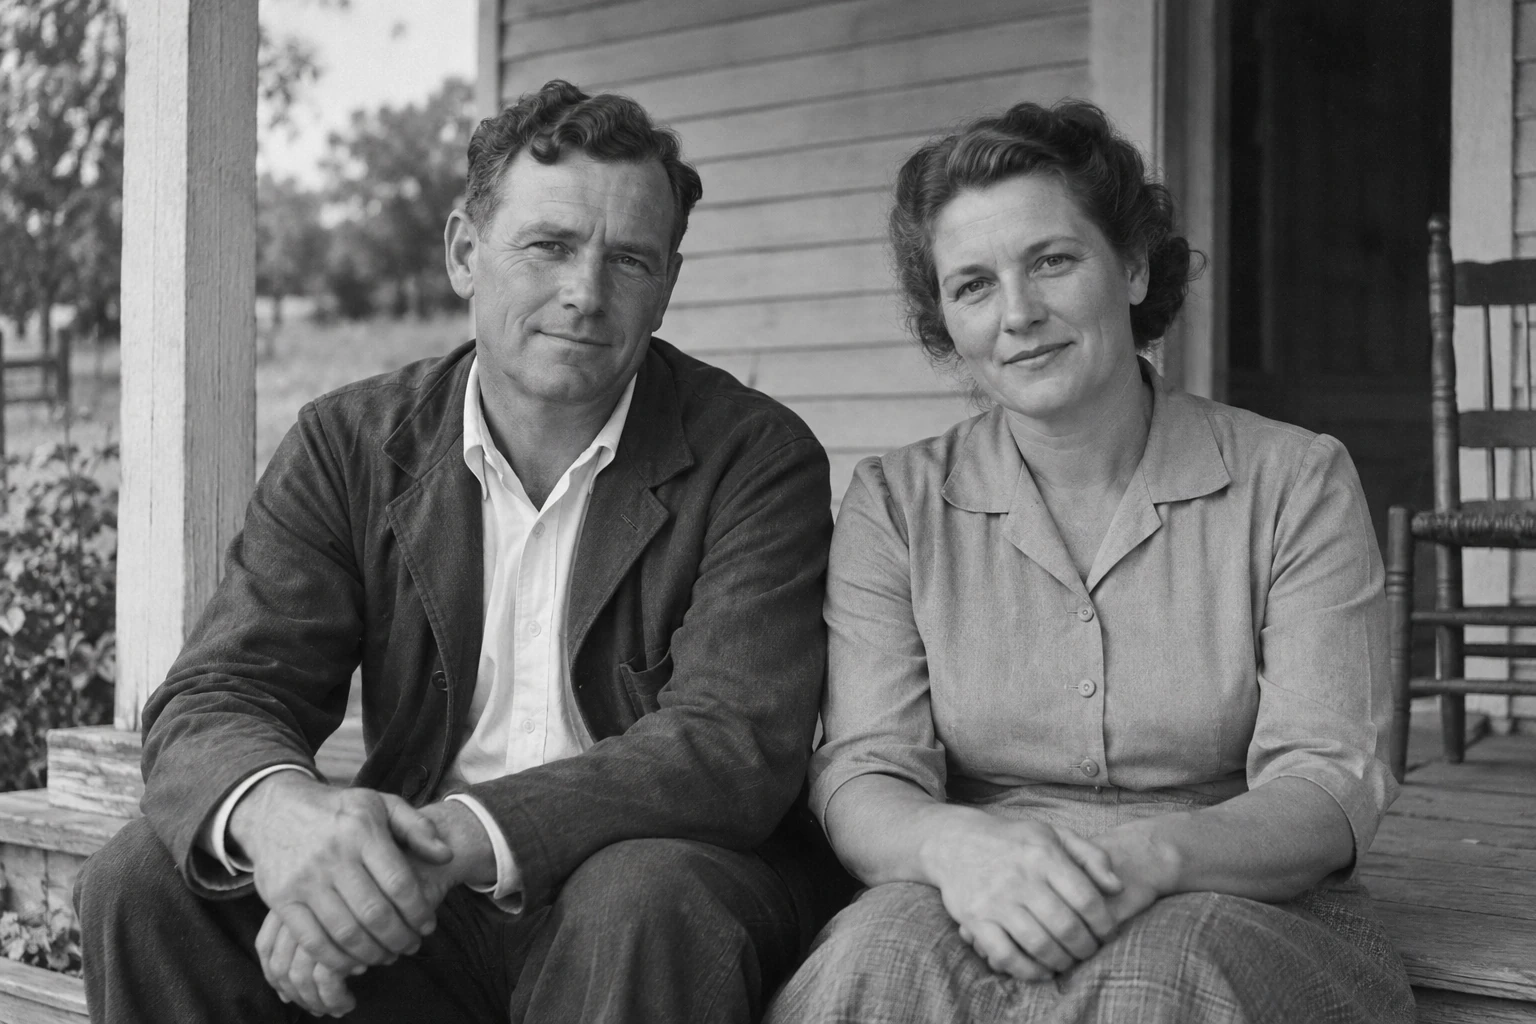
Synthetic source: an AI-generated vintage-style portrait of fictional adults, not a real family photograph or historical record.
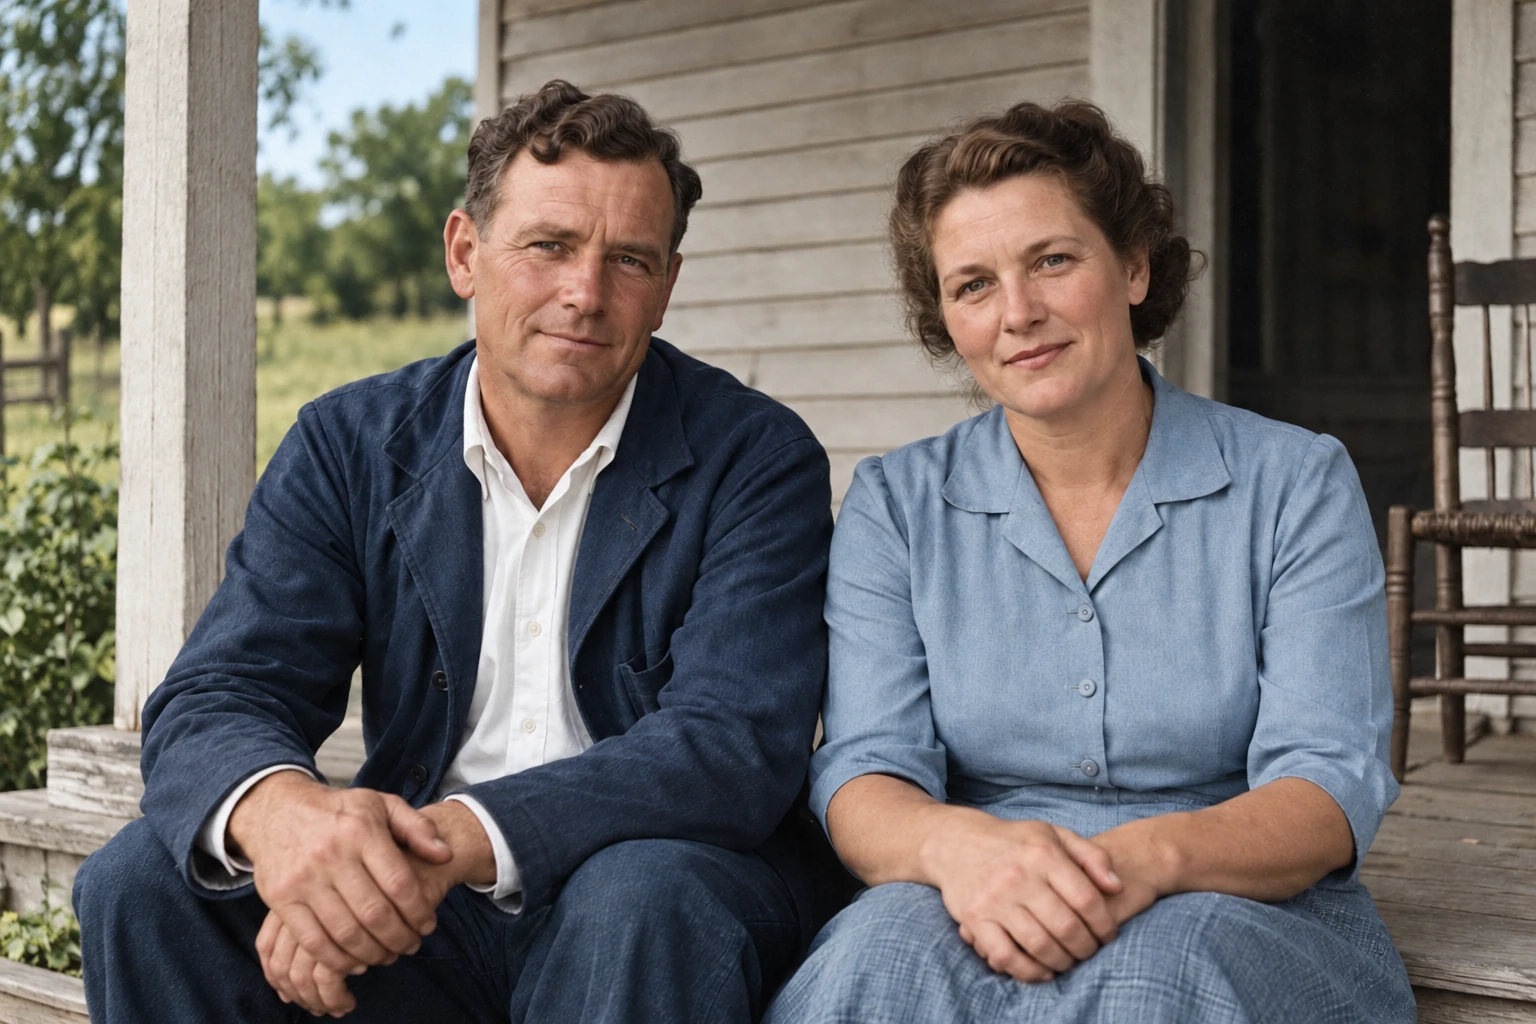
AI colorization demonstration: the synthetic black-and-white source above was supplied to a separate image-editing call. This is not a Photoshop or Photo Editor AI test, and its colors are not historical evidence.
The pair shows why the original should stay available: you can compare the people, pose, clothing outlines, and background after color has been added. Here, the edited skin and fabric also look smoother, so adding color was not the only visible change. It illustrates the task, rather than proving how another editor will perform on your photograph.
5. Save an editable version and a shareable copy
Save the layered working document as a PSD under a new name, keeping the layers enabled. Then use File → Save a Copy for a separate JPEG or PNG. Adobe's saving guide explains that this makes a copy while leaving the editing document open; format-specific options may follow.
Reopen the exported file. Check its dimensions, framing, faces, and the areas you corrected. Do this before sending it: the editable document and exported copy serve different purposes. For a print, use the old-photo printing guide to check size and prepare a proof.
Keep three things together: the untouched scan, the editable color version, and the exported copy. Add a note such as “AI-colorized interpretation; jacket color based on family recollection; other colors approximate.” For a publicly shared image, put the colorization label in the caption as well as the filename.
If you dislike the result, use Revert for the Quick Action or return to the untouched source and saved working version. A separate source file is a more reliable starting point than trying to reconstruct the original from a flattened colorized export.
Frequently asked questions
Can AI recover the exact original colors?
Do not treat an AI colorization as proof of the original colors. Use independent references for choices that matter, and label unsupported choices as approximate or interpretive.
Why does my black-and-white image need RGB mode?
Black-and-white appearance and document mode are different. Adobe advises RGB mode for the Colorize workflow so the document can hold color. The mode change itself does not colorize the picture.
What should I do if only the clothing color is wrong?
Use a color focal point in Photoshop's Colorize Neural Filter, choose the garment color, and inspect nearby skin and edges. Correct the local choice before changing the whole image's balance.