Natural portrait retouching is a decision about what to leave alone. The goal is not to make every pixel smooth. It is to reduce a temporary distraction, balance an uneven tone, or clean a mark while keeping the person’s texture and structure recognizable.
That standard matters when you use an automatic enhancer. A result can look polished at thumbnail size and still fall apart around the eyes, hairline, or cheeks. This guide gives you a practical texture check, a restrained workflow, and a way to decide whether Photo Editor AI’s Auto Perfect is a suitable starting point.
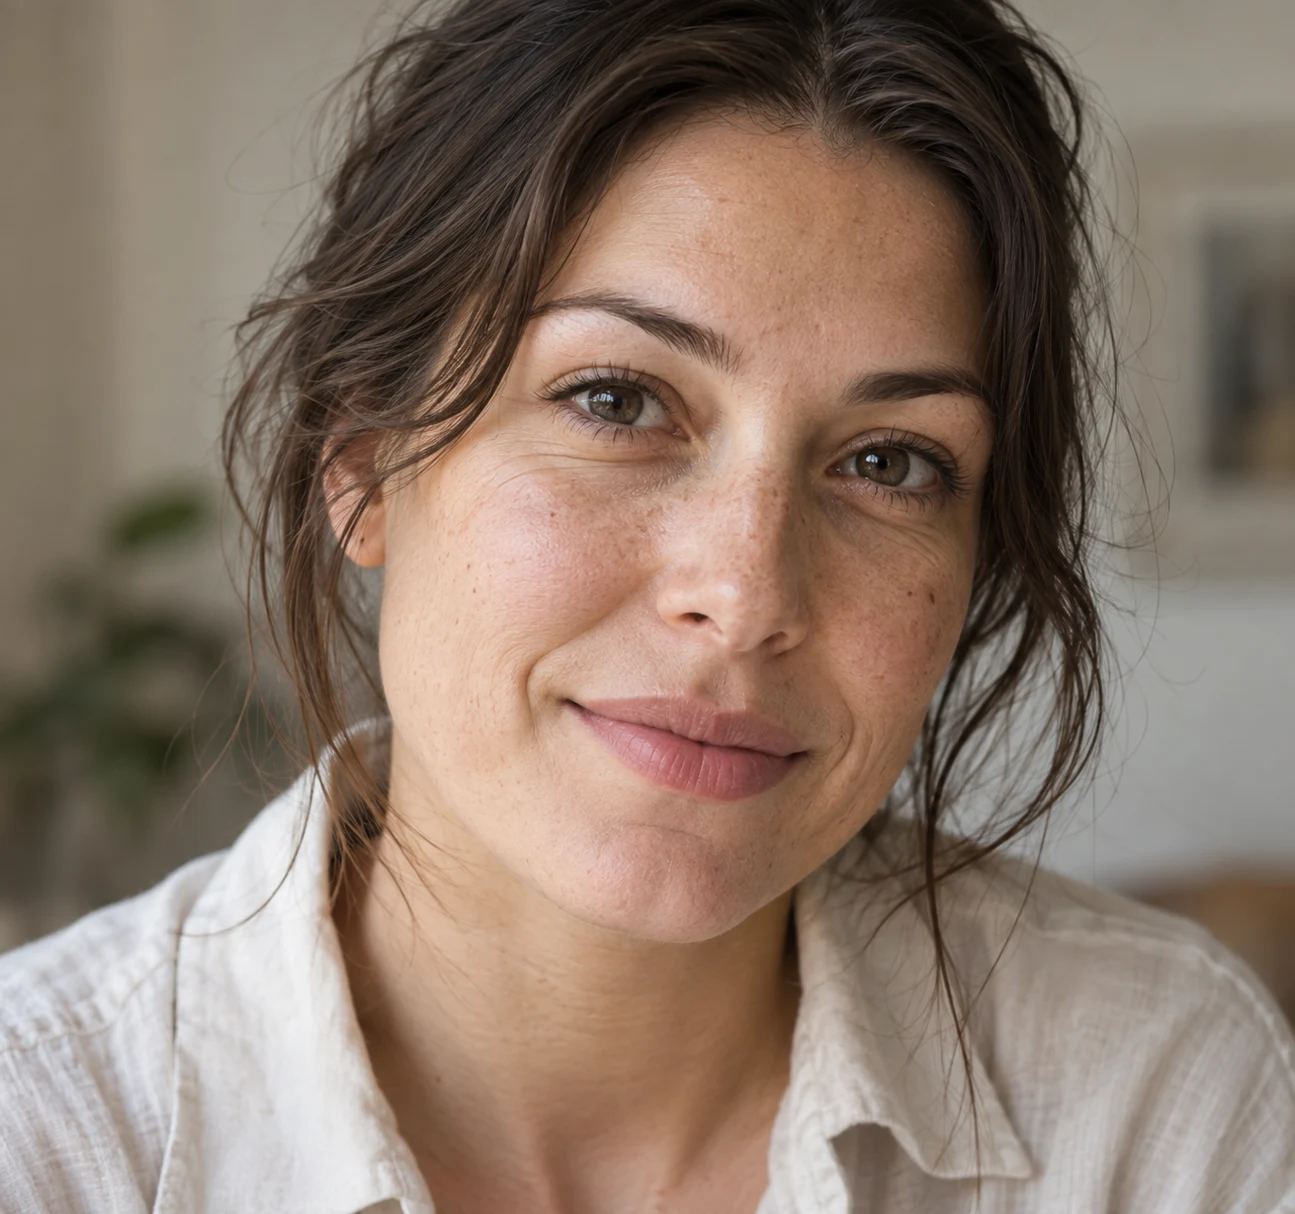
AI-generated illustration of a fictional adult portrait with visible natural skin texture, included to show the texture a reader should inspect during retouching. It is a teaching visual, not a real person’s portrait or a Photo Editor AI result.
What should stay visible?
Skin is not a blank surface. Depending on the person, light, lens, and distance, a portrait may show pores, fine lines, freckles, small colour changes, peach fuzz, and soft transitions around the nose and cheeks. Those details are part of the subject’s appearance, not defects to erase automatically.
A natural result can still be retouched. Removing a temporary spot, reducing a strong red mark, or balancing a bright patch may make the photograph easier to read. The question is whether the change is local and proportionate, or whether the edit has replaced the skin’s pattern with a uniform blur.
Use this simple rule: clean distractions; preserve identity and texture.
Separate cleanup from transformation
Before editing, name the job. These are different tasks:
- Cleanup: remove a temporary blemish, dust mark, or small distraction.
- Tone balancing: reduce a harsh highlight or uneven colour patch without changing facial structure.
- Texture correction: soften a distracting area while retaining some local variation.
- Transformation: change facial shape, age, expression, hair, or identity cues.
The first three can fit natural retouching. The last one is a creative or generative change and needs a different review standard. Do not judge a generated portrait as though it were a faithful retouch of the original.
Inspect a portrait before you touch it
Make a short map of the image:
- Look at the full portrait and decide what attracts your attention first. If the face already reads naturally, broad smoothing may solve a problem that viewers do not have.
- Zoom to the cheeks, forehead, under-eye area, and the edge of the jaw. Notice texture and colour changes before deciding what to remove.
- Mark temporary distractions separately from permanent features. A spot or dust mark may be a sensible cleanup target; a freckle pattern or expression line may be part of the person’s appearance.
- Check hair, eyebrows, eyelashes, lips, and nostrils. These high-contrast edges are where smoothing and reconstruction become obvious.
Take a small reference crop if your editor allows it. The point is not to publish the crop; it gives you a stable comparison while you edit.
A restrained retouching workflow
Start with the smallest useful change
If you are working manually, use a local repair tool for a local problem. Adobe’s Photoshop documentation describes Spot Healing for quickly repairing imperfections and the Healing Brush for sampling pixels from one area and blending them into another. That model is useful even in a different editor: choose a nearby source with similar light and texture, and keep the brush area close to the mark.
Avoid painting broad strokes over an entire cheek. Large strokes combine pores, colour, and lighting into one average surface. If an automatic tool gives you only a global result, you may need to accept a smaller correction or move the final image into an editor with local controls.
Protect edges and structure
Use the eye line, eyelids, nostrils, mouth, hairline, and jaw as stop boundaries. A small halo along the cheek can make a face look cut out. A softened eyelid can change expression. A reshaped nose or mouth is no longer a texture cleanup.
When a mark crosses an edge, repair each side separately or leave a trace rather than blending the edge into the wrong texture. The right edit is sometimes less complete than the algorithm’s default.
Compare at 100% and at thumbnail size
At 100%, check whether pores and fine lines have disappeared, whether texture repeats, and whether the skin has developed waxy bands. At thumbnail size, check whether the face still feels like the same person and whether the edit draws attention to itself.
Do not use only one view. A file that looks subtle close up may look airbrushed at normal reading size, while a tiny repair may look stronger at 100% than it will in use.
Using a one-click enhancer carefully
Photo Editor AI’s Auto Perfect is a one-image route with a fixed enhancement workflow, selectable aspect ratios, and a fixed 1K JPG request. It does not expose a custom prompt or a user-controlled retouching intensity. In practical terms, you can decide whether to accept the returned image, but you cannot assume that the page exposes a slider for “less smoothing.”
If you try the route, choose a copy of the original and decide your keep-list first: facial proportions, freckles, pores, lines, hair, and expression. After processing, compare the result against that list. Look for:
- skin that has the same broad tonal variation as the original;
- pores or freckles that remain irregular rather than repeating;
- eyes, teeth, hair, and lips that keep their edges;
- shadows that have not become gray patches;
- no new symmetry, contour, or feature that changes recognition.
Those checks are a review method, not a promise that every output will pass them. Judge the downloaded file against the original under the conditions in which you plan to use it.
Common signs of plastic skin
Plastic-looking retouching has recognizable symptoms:
- cheeks become a single colour with no local variation;
- pores vanish while hair and eyelashes remain unnaturally sharp;
- under-eye lines disappear but the eye shape changes;
- highlights form bright bands that do not match the light source;
- freckles are removed selectively or replaced by repeated dots;
- the face looks smooth at normal size but muddy when enlarged.
One symptom may be acceptable for a stylized portrait. Several together usually mean the edit has exceeded a natural brief. Reduce the correction, mask it back, or return to the original.
A five-question acceptance test
Before exporting, ask:
- What specific distraction did I intend to reduce?
- Can I point to the area that changed without searching the whole face?
- Are texture and colour still varied in a way that matches the original light?
- Do the eyes, mouth, nose, and face outline keep their shape?
- Would the edit still look reasonable if the viewer saw the original next to it?
If you cannot answer the first question, the edit may be too broad. If you fail the fourth, you are evaluating identity change, not skin texture.
For portraits that are also too dark, read How to Brighten Dark Photos Without Washing Out Skin. For a broader tool-choice decision, see Photo Restoration vs. Enhancement vs. Upscaling.
Conclusion
Natural portrait retouching leaves evidence of a real surface: variation, texture, edges, and the small asymmetries that make a face recognizable. Make the smallest change that solves the named distraction, check the result at two scales, and keep the original available for comparison.